Dynamic Groups Dynamic Object

|
The information in this topic relates to Dynamic Groups. If you are looking for help with the Classic Groups functionality, refer to Classic Groups. |
This feature includes a new dynamic object which can be inserted on any LearnCenter page. It enables you to provide Users with the ability to view the Dynamic Groups to which they belong (My Groups), see either a list of all available Dynamic Groups in the LearnCenter (All Groups), or see only a specific set of Dynamic Groups you indicate. You can also display an option to let Users join Dynamic Groups, or request to join Dynamic Groups (with Admin approval required to join).
On any LearnCenter page:

- Click
 in the management control icons section. The page you are viewing opens in Edit Mode.
- Click
 to modify an existing area of the page.
or
Click Insert New Area Here, select Free-Form (Text and Graphics) from the Area Type drop-down list, and click Create.
- Place your cursor anywhere on the page, and click
 . The Dynamic Object window opens.
- Click
 next to LearnCenter in the Object Types panel.
- Click Groups. The Assignments Wizard opens.
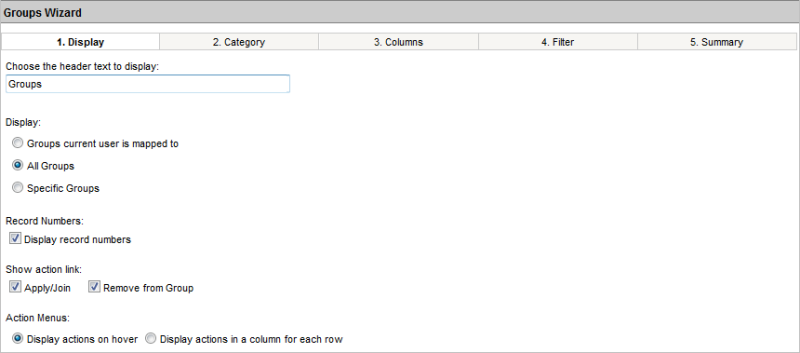
- In the Choose the header text to display box, type what you would like to display above the dynamic object.
or
Use the default text (Groups).
- Select one of the following for Display:
- Groups current User is mapped to - to display on the Dynamic Groups to which the current User belongs.
- All Groups - to display all Dynamic Groups in the LearnCenter.
- Specific Groups - to display only certain Dynamic Groups you indicate. The Find Groups icon displays. Click it, and use the selector window to search for and select the Dynamic Groups you want to display. (See the section above called Dynamic Groups Dynamic Object if you need help with this selector.)
- Select the Display record numbers check box to display row numbers for the results list.
or
Clear the check box to hide row numbers for the results list.
- Select the Apply/Join check box to give Users the ability to join or request to join (where Admin approval is required) a Dynamic Group they see listed in the dynamic object. This field works in conjunction with the Self Service field on the Edit Groups pageDetails tab. If either Open (Approval Needed) or Open (No Approval Needed) was selected for any Dynamic Group, and you select the Apply/Join check box in this dynamic object, when Users rest their pointers on a Dynamic Group to which they do not already belong, the
 icon displays.

Clicking it enables them to join or request to join Dynamic Groups they are interested in. If approval is needed before a User can join, a Communication Message is sent to the Admin.
or
Clear the check box to hide the from Users.
- Select the Remove from Group check box to give Users the ability to remove themselves from Dynamic Groups. This field works in conjunction with the Self Service field on the Edit Groups page Details tab. If either Open (Approval Needed) or Open (No Approval Needed) was selected for any Dynamic Group, and you select the Remove from Group check box in this dynamic object, when Users rest their pointers on a Dynamic Group to which they belong, the
 icon displays.
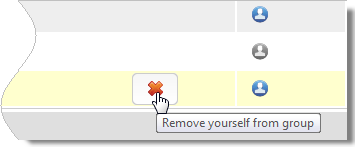
Clicking it removes them from a Dynamic Group.
or
Clear the check box to hide the Remove from Group check box from Users.
- Click one of the following for Action Menus:
- Display actions on hover - to indicate that you want action icons to display when a User rests the pointer on a row.
- Display actions in a column for each row - to indicate you want an Actions column containing the action icons to display.
See About Action Icons for more information about displaying action icons.
- Click Next.
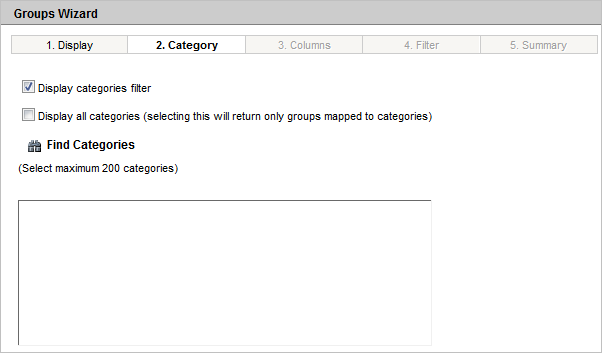
- Click the Display categories filter check box to give Users the ability to filter the list of Dynamic Groups by Category on the dynamic object.
or
Clear the check box to hide the filter from Users.
- Click the Display all categories check box to display only Dynamic Groups that are mapped to Categories.
or
Clear the check box to display all Dynamic Groups, regardless of whether they are mapped to Categories.
- Click Find Categories to search for and select only those Categories you want associated with this dynamic object. Only Dynamic Groups mapped to those Categories will display. You can select up to 200 Categories.
- Click Next.
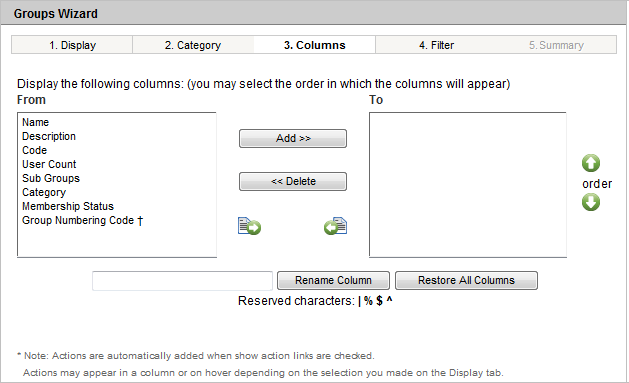
The Columns tab lists all of the available column headers you can choose for display in the Dynamic Object, including any custom Dynamic Groups fields you created. (See Adding New Custom Fields for details.) Custom fields are marked with a  .
.
- Indicate which columns you want to display to Users by moving them to selecting them in the From box and clicking Add to move them to the To box. You can change the order of the columns by using the up and down arrow buttons to move column names up or down in the list.
- (Optional) Rename columns to better suit your organization's needs. To do this, select a column in the To box, type the new column name in the empty field at the bottom of the window, and click Modify Column.

|
You can reset columns back to their original names by clicking Restore All
Columns.
|
- Click Next.
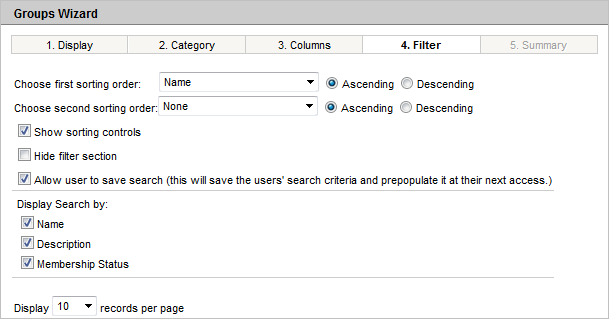
Use the Filter tab to indicate the what sorting order and sorting controls you want to display, and whether or not you want to display a Filter section at all. You can also indicate how many records you want to display in the results.
- Select one of the following options:
- Ascending - to display the columns in ascending order.
- Descending - to display the columns in descending order.
- Choose the secondary sorting order from the Second Sorting Order drop-down list. The column choices in the Second Sorting Order drop-down list are based on the columns you chose on the Columns tab. You will not see the column that you chose in the First Sorting Order in this drop-down list. The default is None.
- Select one of the following options:
- Ascending - to display the columns in ascending order.
- Descending - to display the columns in descending order.
- Click the Show Sorting Controls check box if you want to display the primary and secondary sort to the User. (Default)
or
Clear the check box if you do not want to display the primary and secondary sort to the User.
- Click the Hide Filter Section check box if you do not want to display the search section to the User.
or
Clear the check box if you want to display the search section to the User. (Default)
- Click the Allow User to Save Search check box if you want to allow the User to save the search criteria. (Default)
or
Clear the check box if you do not want to allow the User to save the search criteria.
- Select the Name check box to indicate that you want to display the search by name.
or
Clear the check box to indicate that you do not want to display the search by name.
- Select the Description check box to indicate that you want to display the search by description.
or
Clear the check box to indicate that you do not want to display the search by description..
- Select the Membership Status check box to indicate that you want to display the search by membership status.
or
Clear the check box to indicate that you do not want to display the search by membership status.
- Select the number of results you want to appear per page from the Display Records Per Page drop-down list.
- Click Next. The Summary tab displays a summary of the selections you made throughout the wizard.
- Click Return Selected to submit your selections and add the dynamic object to the LearnCenter page.
- On the WYSIWYG tool bar, click
 .
.
- Click
 to review how your selections will appear to Users.
The following is an example of what Users see. What displays depends upon the selections you just made in the wizard.
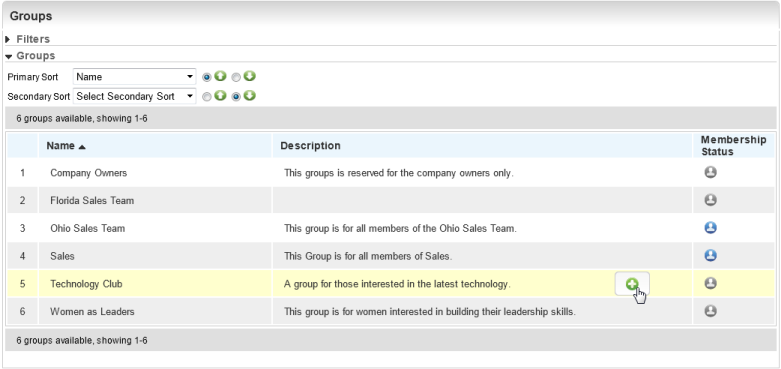
The icons in the Membership Status column indicate whether a User is a member of a Dynamic Group.
 - (blue) indicates a User is a member of the Dynamic Group or one of the Dynamic Group's sub Groups. If the icon is blue and the icon displays when a User rests the pointer over the Dynamic Group, it means the User is already a member of one of the listed Dynamic Group's sub Groups, and that he or she has the ability to join the parent Dynamic Group.indicates a User is a member of the Dynamic Group.
 - (gray) indicates a User is not a member of the Dynamic Group.
 - (yellow) indicates a User's membership to the Dynamic Group is pending. The User's request is awaiting approval by an Admin.
Notice in the example above that some of the Dynamic Groups are open to join, because the icon displays when the User rests the pointer on certain Dynamic Groups.
 Related Topics

Copyright © 2010-2015, Oracle and/or its affiliates. All rights reserved.